All threaded holes in the block and cylinder head should cleaned and tapped with a thread chaser. All bolts being installed should be lubed with a light oil or anti-seize on the bolt threads before assembly.
If your factory R4 compressor has a high pressure cut of switch we recommend using an aftermarket Four seasons retro add on switch kit- Here.
*We recommend leaving all of the bolts slightly loose until all the parts are installed. Then go back and torque each bolt to 28 ft. lbs. Install the smaller rear bracket using 2 "A" spacers between the bracket and passenger cylinder head using two flat head bolts as shown.
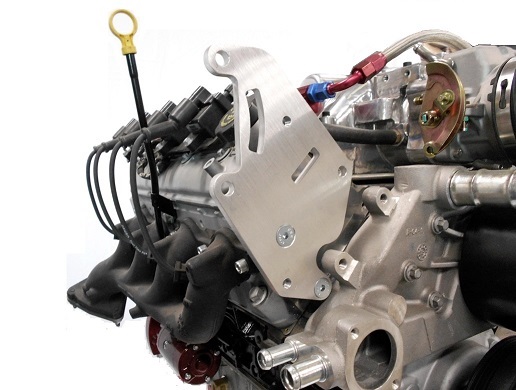
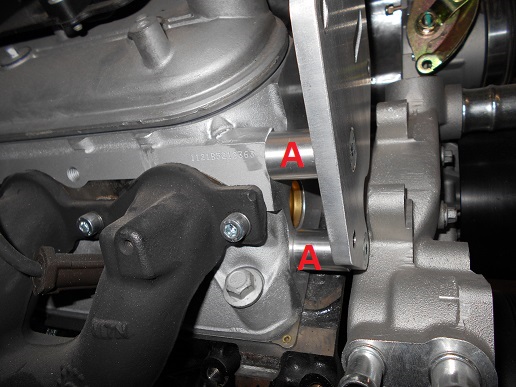
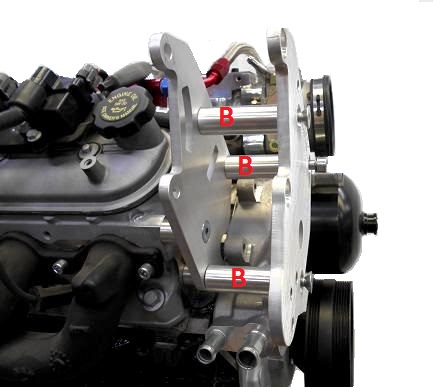
Next install the front bracket using the longest socket head bolt in the top hole and 1 "B" spacer between the two brackets and one "A" spacer between the rear bracket and the cylinder head.
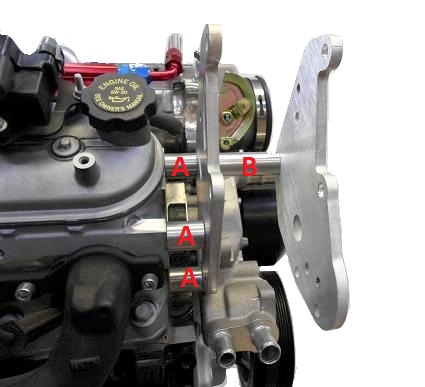
Install the other two "B" spacers between the brackets. Both of the bolts are countersunk and thread into the rear plate. Leave all of the bolts loose as shown.
Now install the R4 compressor between the two brackets using the two 110mm bolts with the lock nuts and stainless washers on the rear side.
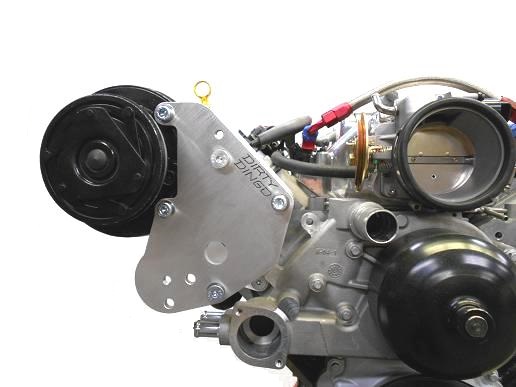
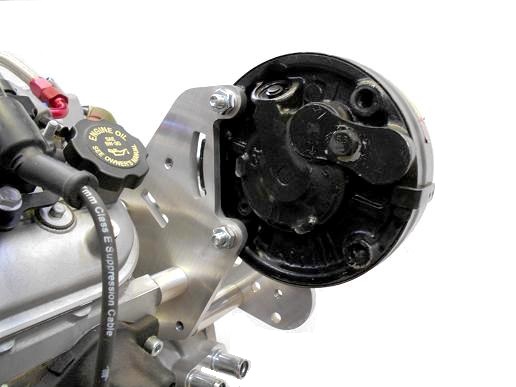
While lifting the weight of the compressor. Tighten all bolts to 28 ft lbs. Start with the counter sunk bolts first, rear bracket to cylinder head, then the front bracket, and finally the compressor. Next install the top idler pulley. Place the billet spacer against the front plate. The machined end fits inside the pulley. This bolt comes with a locknut and stainless washer for the rear to keep this locked into place. Tighten the bolt to 28 ft. lbs. then tighten the locknut on the rear to 28 ft. lbs.
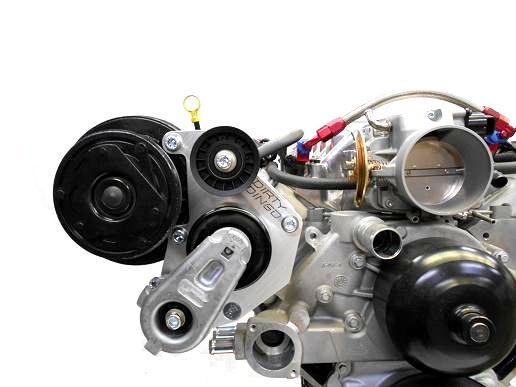
TENSIONER INSTALLATION-
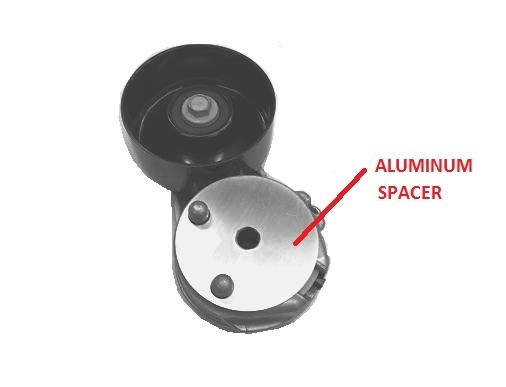
Place the flat aluminum spacer plate that comes with the tensioner between the tensioner and the front plate as shown. Tighten tensioner bolt to 28 ft. lbs.
To install the belt place a 3/8 ratchet and extension into the front of the tensioner and twist down.
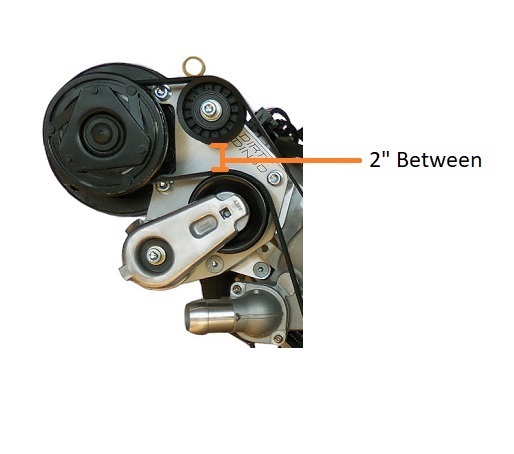
Correct belt tensioning can be determined by the distance between the tensioner and idler pulleys. When using small diameter pulleys and test fitting belts, you want as close to 2" between the two pulleys as possible.
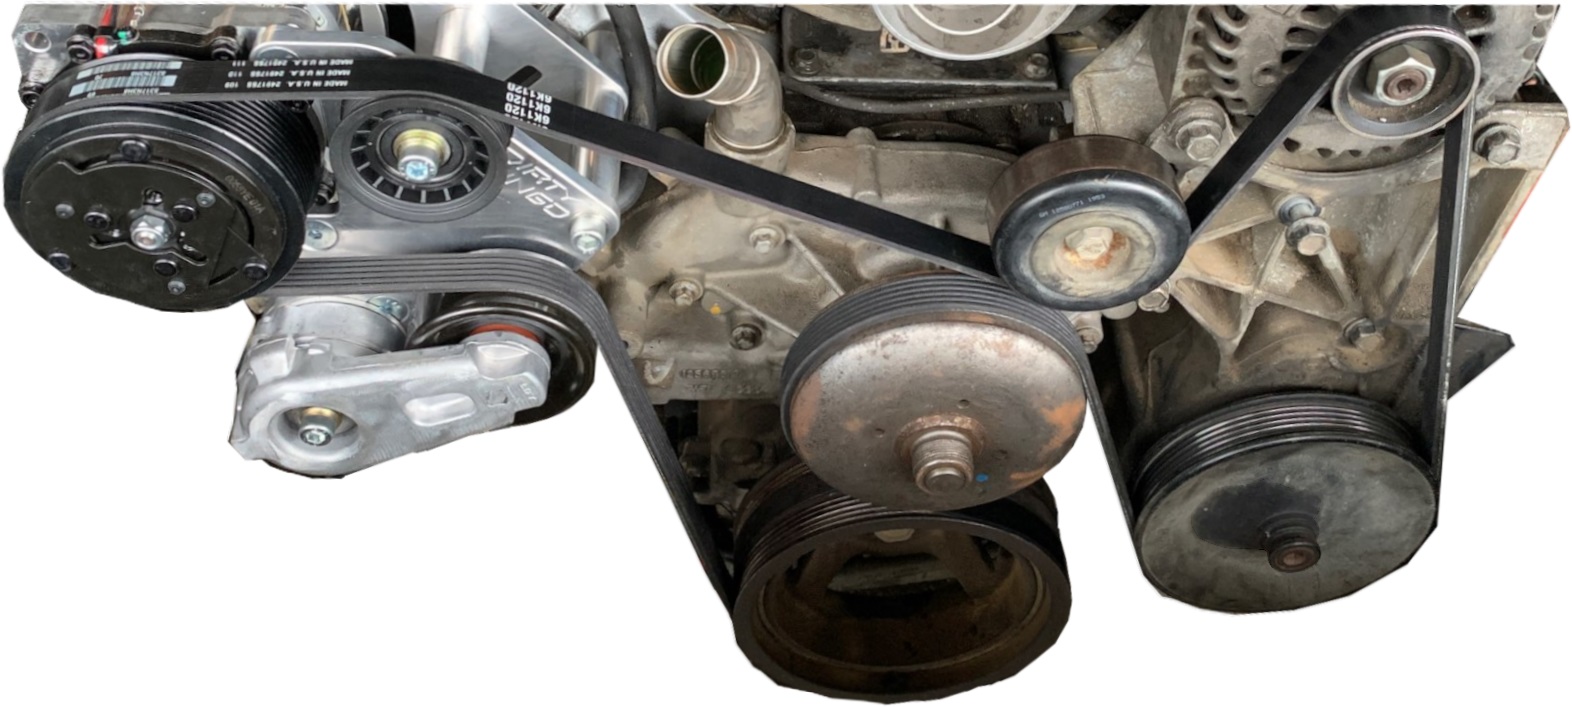
Stock Truck Accessory Bracket Routing
Replacement tensioner click here
BELT SIZE OPTIONS-
These belt sizes are for using a clutch diameter of 4.33". A larger clutch will require a slightly longer belt.
Stock truck accessories-
Small case alternator (135 amp and lower) Gates K061110
Large case alternator (140 amp and larger) Gates K061115
Stock Trail Blazer truck accessories-
Small case alternator (135 amp and lower) Gates K061098
Large case alternator (140 amp and larger) Gates K061105
Truck accessories using Dirty Dingo billet Alt/PS low power steering mount bracket-
Small case alternator Gates K060960
Large case alternator Gates K060966
Truck accessories using Dirty Dingo billet Alt/PS high power steering mount bracket-
Small case alternator Gates K060988
Large case alternator Gates K060997
Truck accessories using Dirty Dingo DD-LS-IRB- idler relocation bracket-
Small case alternator Gates K061187
Large case alternator Gates K061195
Dirty Dingo DD-LS1-ALT-PS- LS1 Corvette Style alternator-power steering bracket-
Small case alternator Gates K061005
Large case alternator Gates K061010
Dirty Dingo DD-LS-SR-ALT-PS-1 - LS Alternator Type 1 Power Steering Street Rod
Small case alternator Gates K060984
Large case alternator Gates K060990
Dirty Dingo DD-LS-SR-ALT-PS-2 - LS Alternator Type 1 Power Steering Street Rod
Small case alternator Gates K060942
Large case alternator Gates K060947
DD-LS-SR-ALT LS Alternator Only Street Rod High Mount
Small case alternator Gates K060888
Large case alternator Gates K060895
Stock Camaro accessories-
Gates K060975
* When using small diameter power steering pulley subtract 2" from belt length.
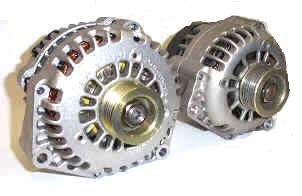
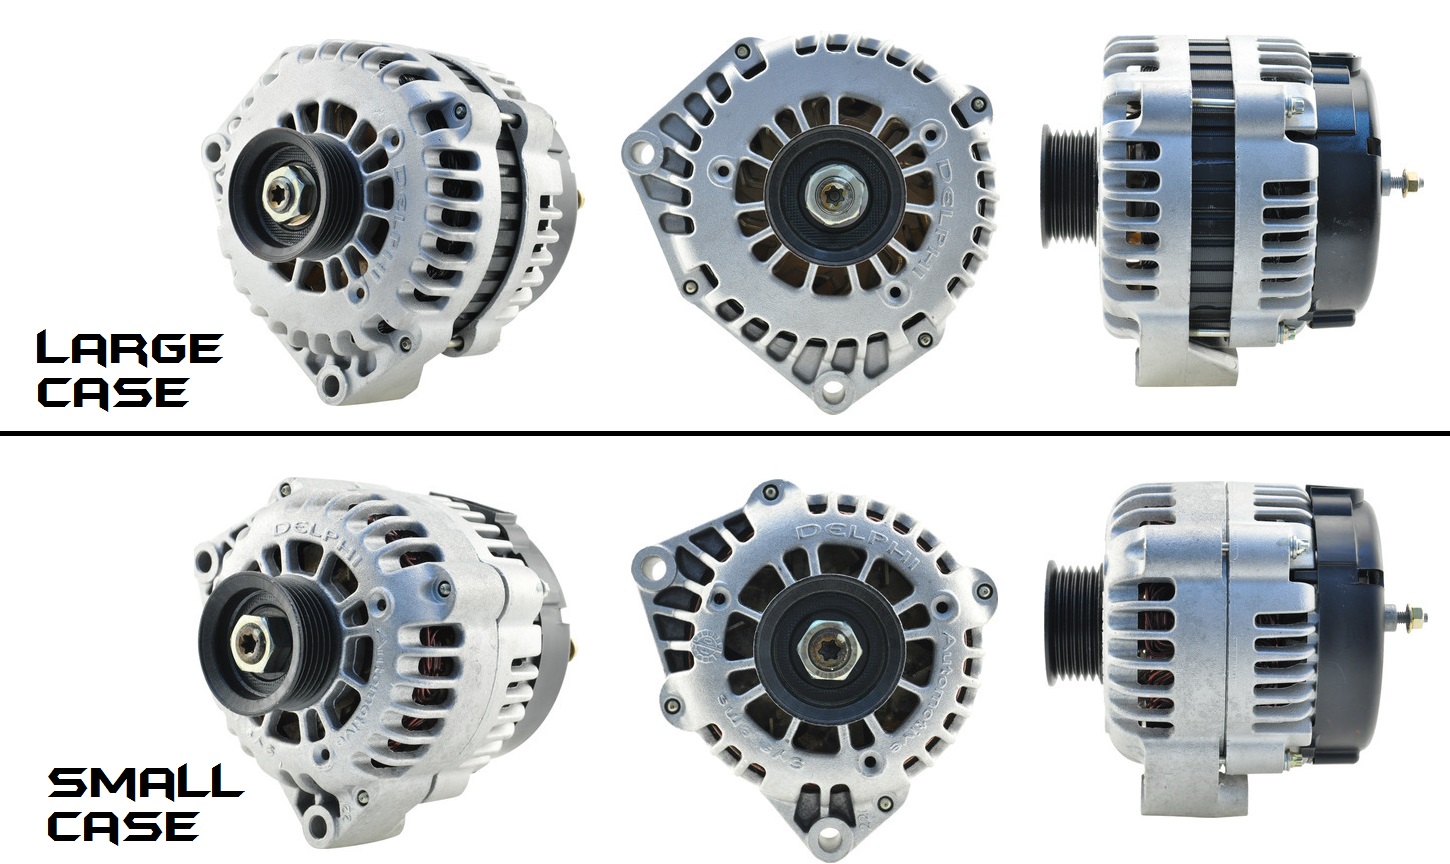
Small case alternators are 135 amp and lower. Large Case alternators are 140 amp and higher.
Large case is on the left-