All threaded holes in the block and cylinder head should cleaned and tapped with a thread chaser.
All bolts being installed should be lubed with a light oil or anti-seize on the bolt threads before assembly.
The blower and the water pump must be removed to install this kit. You will need a remote power steering reservoir.
Water Pump Adapters-
You must first install the water pump adapters- select HERE.
AC Bracket-
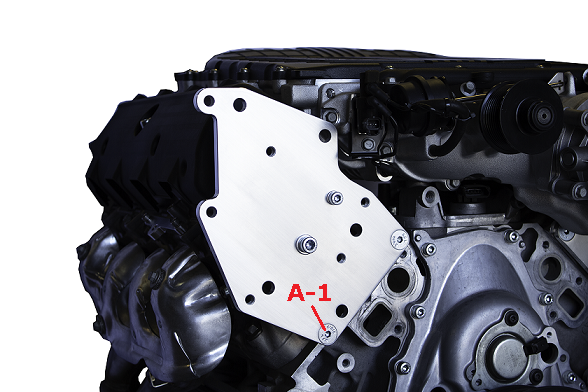
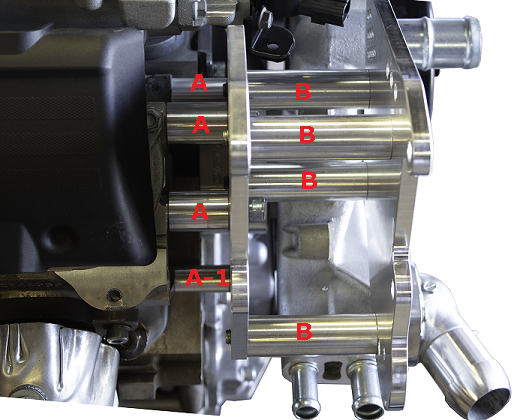
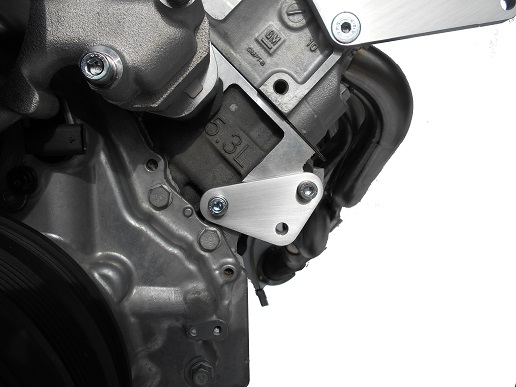
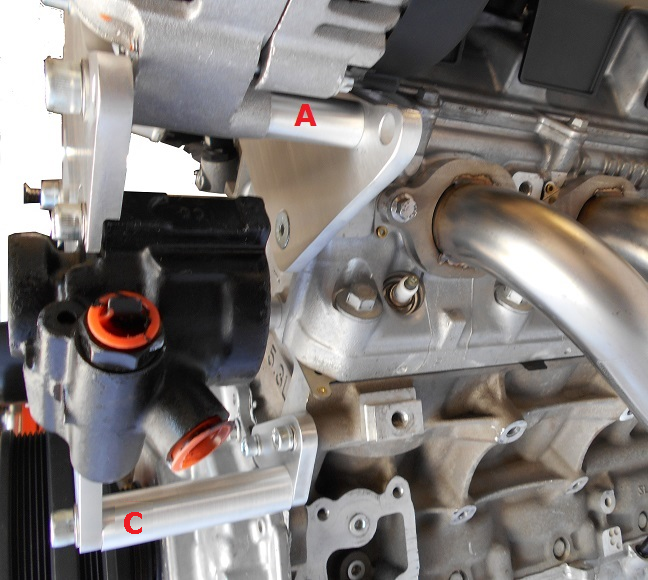
This kit is designed to be used with a Gen IV 2008 LS3 Corvette water pump with the passenger side forward facing outlet. The water pump will need to be removed to install the rear AC bracket to the passenger side cylinder head. Install the "A" spacers between the rear AC bracket and the passenger cylinder head using two 10MM flat head bolts, one 10MM socket head bolt with stainless washer, and one 8MM socket head bolt with stainless washer. The bottom flat head bolt uses the smaller diameter A-1 spacer. Torque 10MM bolts to 28 ft lbs. and 8MM bolts to 12 ft. lbs. Next install the water pump adapters and the water pump.
Click HERE for water pump adapter installation instructions.
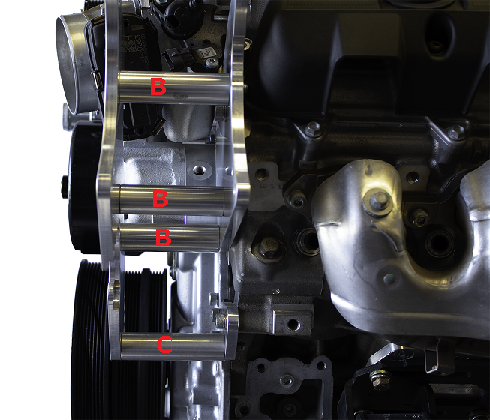
Install the front plate to the rear plate using the B spacers and 10mm Flat Head bolts. Torque to 28 ft lbs.
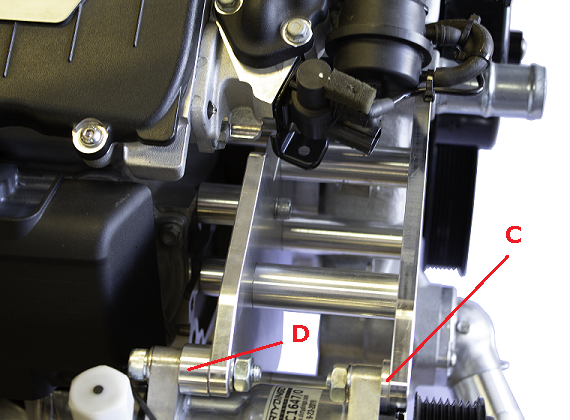
Mount the compressor between the front and rear plate using the "C" and "D" spacers. The front spacers, "C", use the flat head bolts with one stainless washer under each nut The rear spacers, "D", use the socket head bolts with two stainless washers each. Torque bolts to 28 ft lbs.
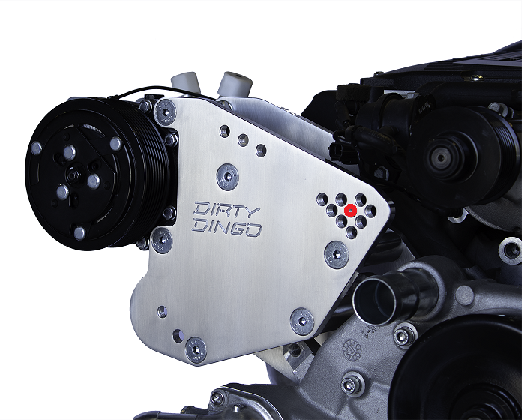
Install the idler pulley onto the front plate. This can be moved around depending on if you are using a large or small case alternator, or a smaller pulley on the supercharger etc. The gold washer goes under the bolt head, the stainless washer and nut are installed on the backside of the bracket after you determine the correct location of the idler pulley. The red dot is the most common starting point hole to mount the idler pulley.
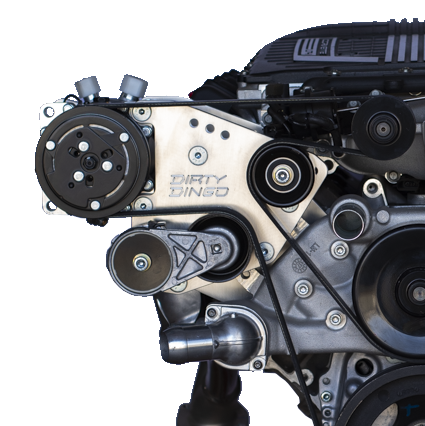
Install the tensioner onto the front bracket. Torque bolt to 28 ft lbs.
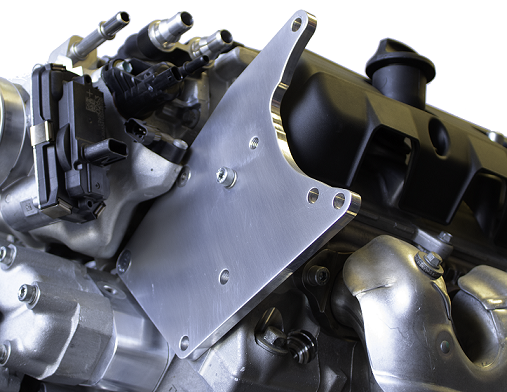
Rear AC Brace-
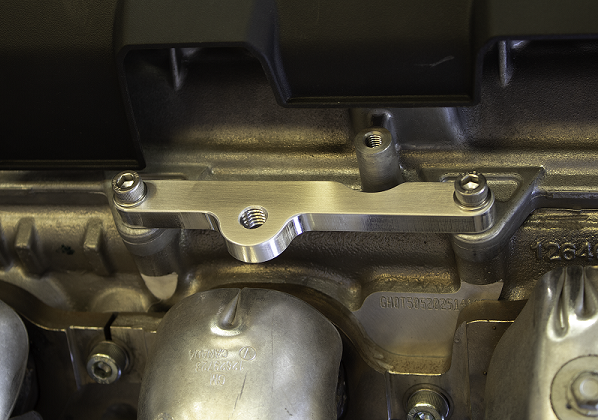
The rear brace is designed to keep the AC bracket from flexing under extreme applications. Install the billet aluminum bracket on top of the valve cover using supplied bolts.
The compressor tab bolts directly to the outer compressor ear.

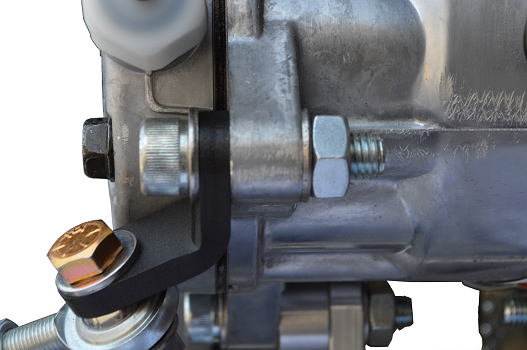
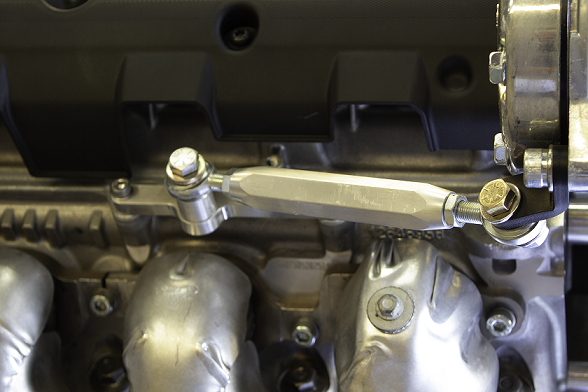
Align the tab on the compressor pointed as straight as possible towards the mounting bolt on the billet bracket mounted on top of the valve cover. With the belt off, tighten the bolt on the compressor mounting ear. Adjustment on the rod should be JUST snug to keep the bracket from pulling forward. Do not over tighten the brace with an impact to where it will bend the bracket.
Alternator / Power Steering Bracket-
Start with mounting the rear bracket to the driver's side cylinder head. Place the rear bracket directly against the cylinder head using the 2 counter sunk 10MMX25MM and 8MM X 25MM bolts and 1 socket head 8MM X 20MM bolt with stainless washer. This picture shows why you must remove the supercharger before installing this rear bracket.
Mount the bottom brace in this orientation onto the block using 2 8MM X 25MM bolts and stainless washers.
Install the front bracket onto the rear bracket on the engine.
"A" spacers fit behind the alternator and in front of the rear bracket using two 10MM X 120MM socket head bolts.
"B" spacer fits between the front and rear brackets using three 10MM X 120MM flat head bolts.
"C" spacer is on the bottom using a 10MM X 110MM flat head bolt.
Bolt the 1998-02 Camaro LS1 power steering pump onto the front bracket using one 8MM X 20MM socket head bolt with stainless washer, and two 8MM X 75MM bolts with stainless washers and lock nuts. Mount the alternator between the front and rear brackets using 2 "A" spacers behind the alternator and two 10MM X 120MM bolts. Place a stainless washer on each end and use the 10MM lock nuts.
Torque all 10mm bolts to 28 Ft. Lbs. and all 8mm bolts to 12 Ft. Lbs. Install lower idler pulley onto the front bracket as shown. The most common position for the idler pulley is the top hole. We give you multiple holes for with idler placement depending on what size supercharger pulley and if you may be running an aftermarket crank pulley, this will allow more adjustability for changes in the future.
Power Steering Pulley-
All billet power steering pulleys should be installed dry, with no lube of any type. The power steering pump shaft should be clean and free of damage. The pulley is machined with a larger step on the opening to aid in getting the pulley straight during installation. Clean the pump shaft and the inner hole on the billet pulley with brake parts cleaner. Camaro pulleys have a machined stop inside the pulley and will not be installed flush to the pump shaft as seen from the front. Pump threaded hole should cleaned and tapped with a thread chaser. Pulley should be installed using the correct install tool. Install the included bolt with billet washer and torque to 28 ft lbs.
Power steering Return Fitting-
Install this fitting last, after determining the angle that will be needed to line up with your remote reservoir. This is a press in fitting. Make sure fitting and pump holes are clean. We recommend using a very thin coat of silicone adhesive. Position the fitting and using a plastic mallet you can use a light tap to seat the fitting.
Blower-
Reinstall supercharger and torque to factory specs. (89-inch pounds tightened twice, in sequence to the same torque value)
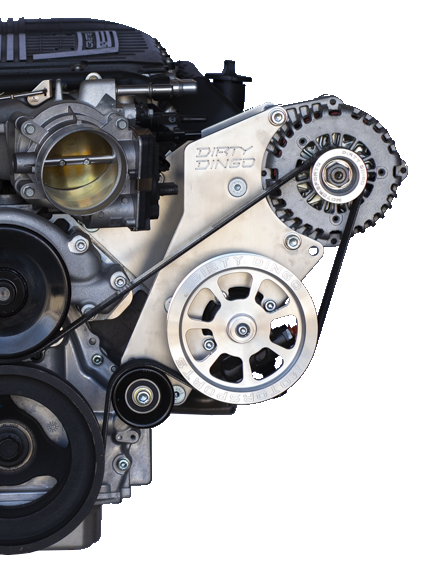
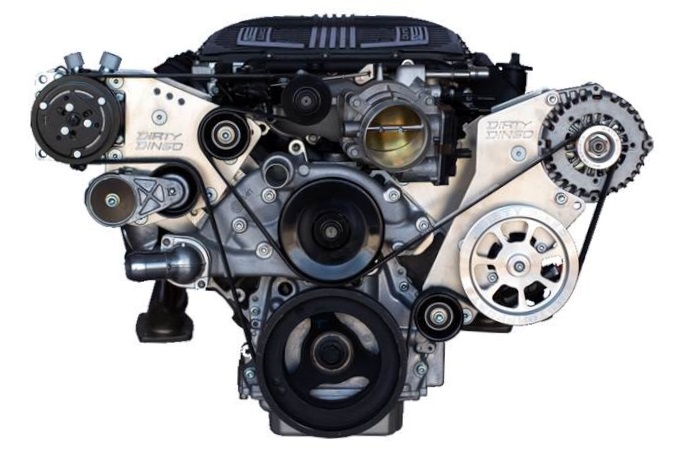
Belt Routing-
Check the tensioner edge to verify the tensioner is sitting in the middle of its travel. If the belt
needs to be looser you can move the AC idler pulley closer to the supercharger pulley. If it needs
to be tighter, move the idler closer to the AC compressor. The belt should be routed around all
pulleys and slipped over the water pump pulley last. The belt should be so tight that it requires
two people to install it, it will stretch slightly over time.
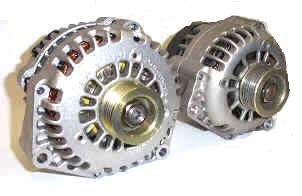
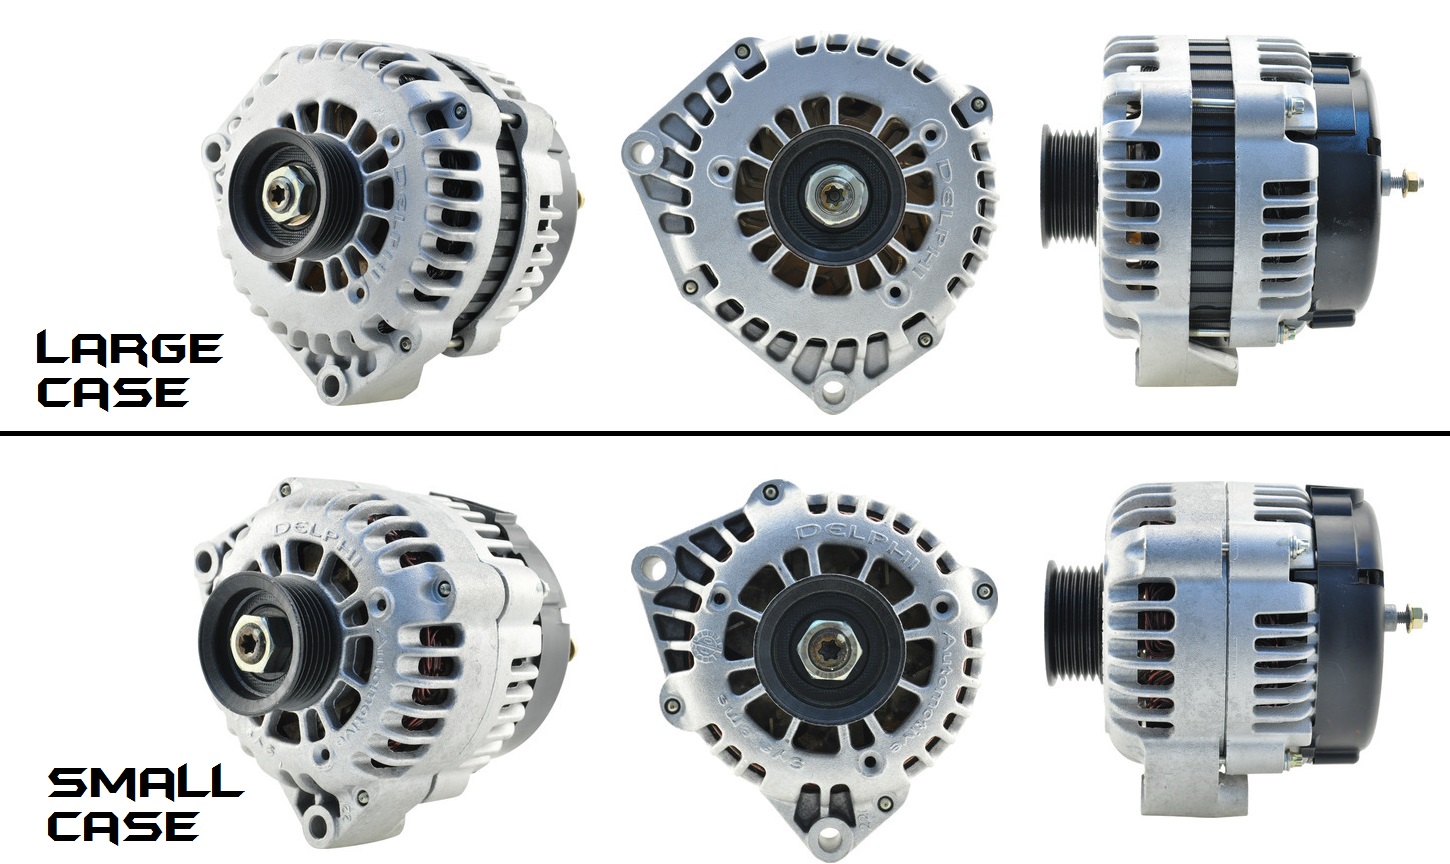
Small case alternators are 135 amp and lower. Large Case alternators are 140 amp and higher.
Large case is on the left-