All threaded holes in the block and cylinder head should cleaned and tapped with a thread chaser.
All bolts being installed should be lubed with a light oil or anti-seize on the bolt threads before assembly. This kit is designed to be used with an 8 rib 4711 Sanden AC compressor only. Will not work with any other compressor clutch spacing.
Water Pump Spacers-
Install the water pump spacer with the coolant bypass fitting on the driver's side of the engine. If you do not want to use the coolant bypass a plug is supplied in the kit. Either way, the threads should be installed with teflon sealant.
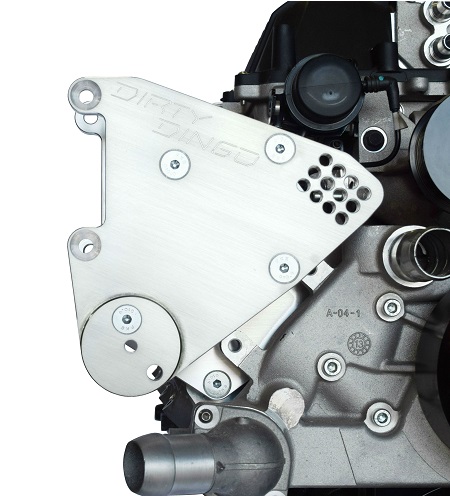
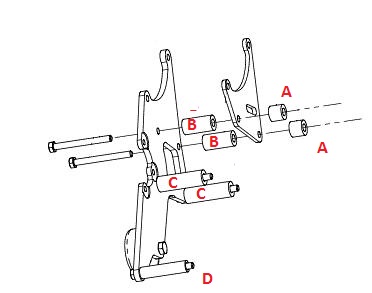
AC Bracket-
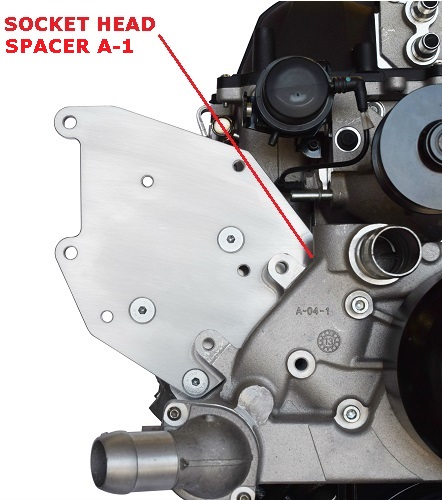
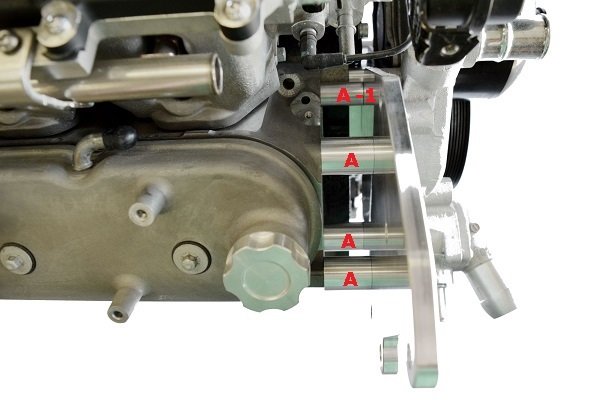
This kit is designed to be used with a 1998-02 Camaro LS1 water pump. The water pump will need to be removed to install the rear AC bracket to the passenger side cylinder head. Install the "A" spacers between the rear AC bracket and the passenger cylinder head using 3 60MM flat head bolts, and one socket head bolt with small stainless washer. The socket head bolt uses the spacer A-1. Torque bolts to 28 ft lbs.
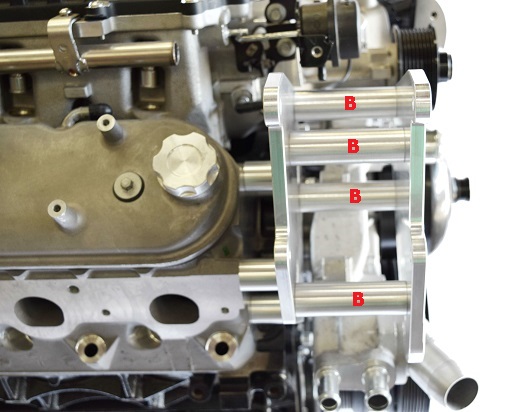
Install the top plate onto the bottom plate using the 4 billet "B" spacers between the two plates and the 4 100MM flat head bolts. Torque bolts to 28 ft lbs.
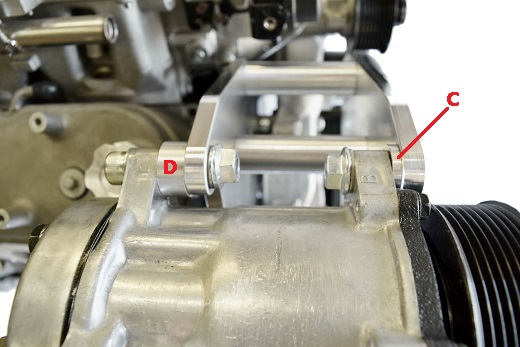
Mount the compressor between the front and rear plate using the "C" and "D" spacers. The front spacers, "C", use the flat head bolts with one stainless washer under each nut. The rear spacers, "D", use the socket head bolts with two stainless washers each. Torque bolts to 28 ft lbs.
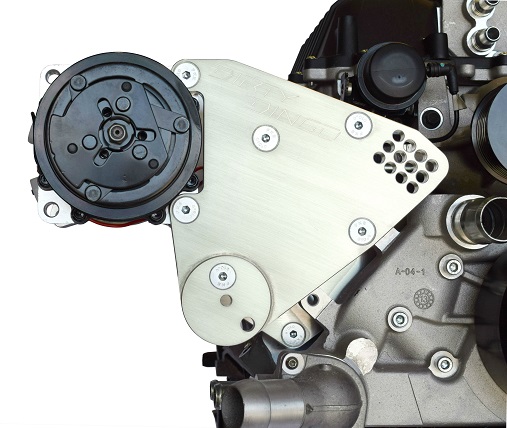
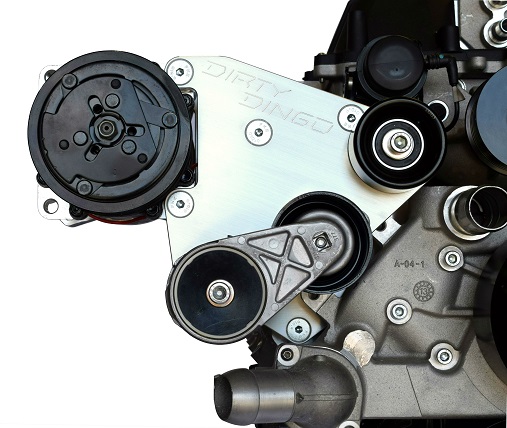
Insttall the idler pulley onto the front plate. This can be moved around depending on if you are using a large or small case alternator, or a smaller pulley on the supercharger etc. The gold washer goes under the bolt head, the stainless washer and nut are installed on the backside of the bracket after you determine the correct location of the idler pulley.
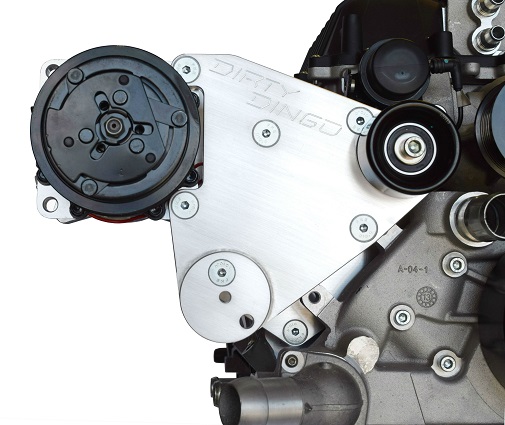
Install the tensioner onto the front bracket. Torque bolt to 28 ft lbs. There is an aluminum billet spacer that mounts between the tensioner and the front plate.
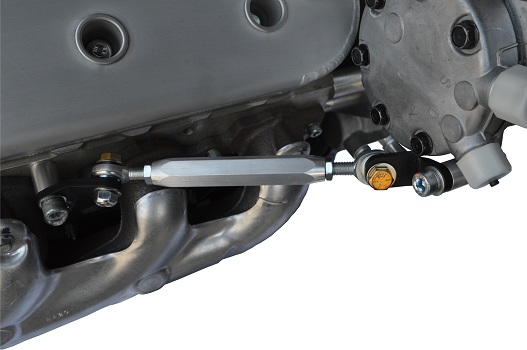
Rear AC Brace-
The rear brace is designed to keep the AC bracket from flexing under extreme applications. The tab with the higher degree bend mounts to the compressor ear.
The compressor tab bolts directly to the outer compressor ear when using Corvette, G8, and non-supercharged CTSV balancer spacing using the 40 MM long bolt

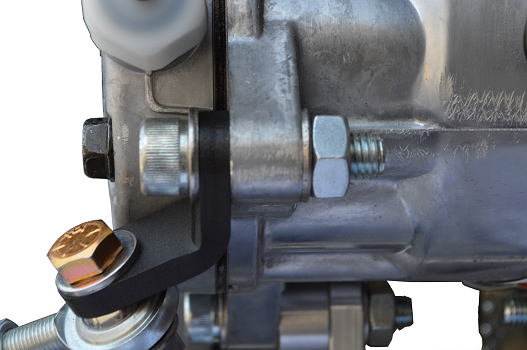
Position the spacer as shown when installing Camaro, Firebird, GTO, Vortec Truck or VVT applications using the 60 MM long bolt.
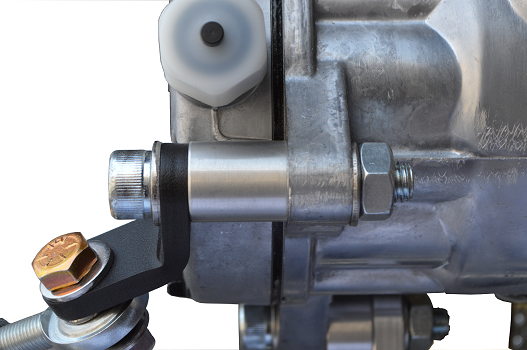
Align the tabs pointed as straight as possible pointing towards each other. With the belt off tighten the bolt in the cylinder head and at the compressor ear. Adjustment on the rod should be just snug to keep the bracket from pulling forward. Do not over tighten the brace to where it will bend the bracket.
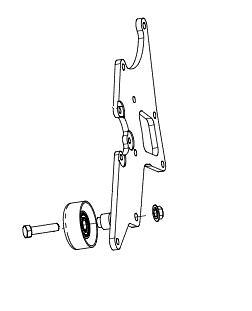
Alternator / Power Steering Bracket-
All threaded holes in the block and cylinder head should cleaned and tapped with a thread chaser. All bolts being installed should be lubed with a light oil or anti-seize on the bolt threads before assembly. This kit is designed to be used with 1998-02 Camaro power steering pump. Begin by installing the lower pulley kit to the front bracket. Install the billet pulley stand using the included bolt with grade 8 washer on top of pulley and the billet pulley stand with billet spacer under the pulley. The bolt includes a small stainless washer and a lock nut for the back side. Torque the nut on the rear while holding the front bolt to 24 ft. lbs.
Next, mount the front plate onto the block. Use the longest bolts in the kit. Spacer "D" is placed at the bottom.

Then, mount the rear plate between the head and the outer plate using the "A" spacers against the head, and the "B" spacers between the two plates. Corvette does not use an "A" spacer.
Next, mount the alternator between the two plates using the two 80 MM bolts. Place a small stainless washer on both outer sides of the plates and then the lock nuts.
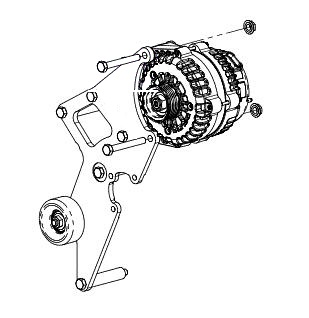
Next, mount the 1998-02 Camaro power steering pump onto the front plate using the supplied 8 MM bolts. We include several long and short bolts to accommodate different styles of pumps. Be sure that your pump has the return pipe stub installed before installing your pump to the outer plate.
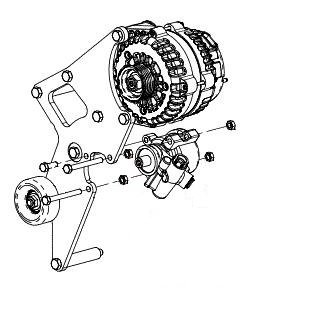
Torque all 10mm bolts to 28 Ft. Lbs. Torque the 8mm bolts to 12 Ft. Lbs. Install power steering pump.
Power Steering Pulley-
All billet power steering pulleys should be installed dry, with no lube of any type. The power steering pump shaft should be clean and free of damage. The pulley is machined with a larger step on the opening to aid in getting the pulley straight during installation. Clean the pump shaft and the inner hole on the billet pulley with brake parts cleaner. Camaro pulleys have a machined stop inside the pulley and will not be installed flush to the pump shaft as seen from the front. Pump threaded hole should be cleaned and tapped with a thread chaser. Pump bolt should be lubed with a light oil or anti-seize on the bolt threads before assembly. Install the included bolt with billet washer and torque to 28 ft lbs.
Proper install tools are talked about in the general Billet Power Steering Pulley install instructions. DO NOT install the pulley with just a bolt and washer as you can damage your power steering pump.
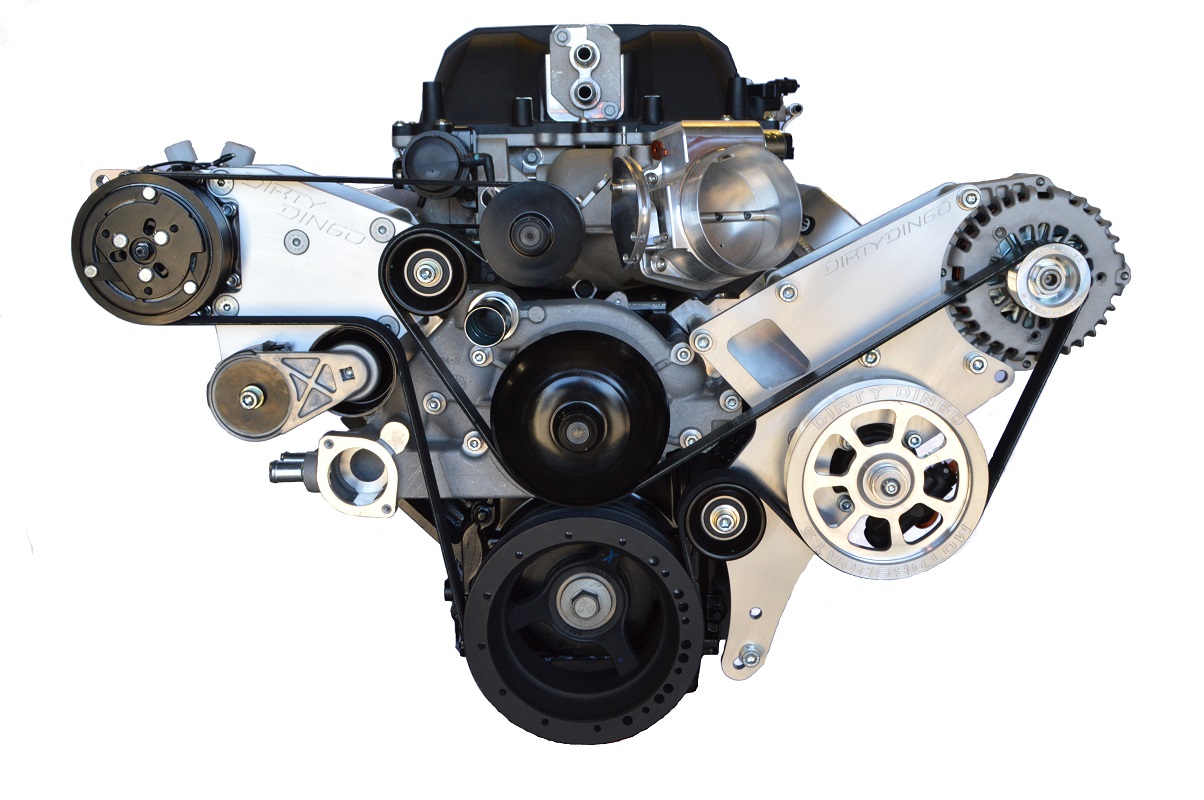
Belt Routing-
Belt Sizes-
Without intake manifold adapters-
Continental 4081153
With intake manifold adapters-
Continental 4081177
Check the tensioner edge to verify the tensioner is sitting in the middle of its travel. If the belt needs to be looser you can move the AC idler pulley closer to the supercharger pulley. If it needs to be tighter move the idler closer to the AC compressor. The belt should be routed around all pulleys and slipped over the water pump pulley last. The belt should be so tight that it requires two people to install it, it will stretch slightly over time.